
If you have a website on Walkles, you’ve probably noticed the zip code checker on your home page and scheduler. It’s a simple and effective way to inform your visitors of your area coverage. In our research, we’ve noticed only a small percentage make that information readily available on their websites. We decided that even if you’re not using Walkles for your pet care website, you should have access to a simple zip code checking tool.
That’s why we’ve made the zip code validator into a widget you can add to your own website hosted outside of Walkles. Here it is in action:
How to Get the Zip Code Validator Widget on Your Website
The first thing you have to do is visit the zip code validator widget page. There are two parts to this page: the widget configuration form, and the widget preview.
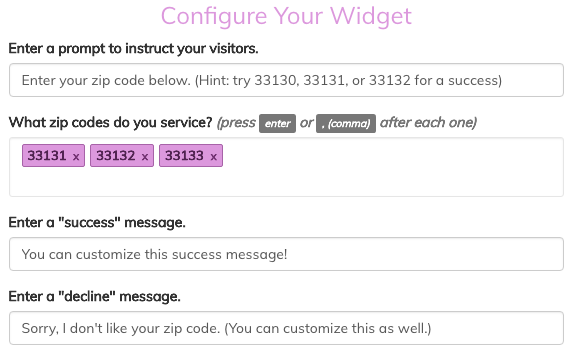
Configure Your Widget
Configuring is simple. You have four things you can configure, three of which you can leave blank for the default values. The four things are:
- Prompt – It’s the notice that appears above the text input box, letting visitors know what to do.
- Zip Codes – The actual zip codes you service. Press return/enter or use a comma to separate zip/postal codes.
- Success – The message that appears if the user entered a zip code that you provided.
- Decline – The message that appears if the user entered a zip code you didn’t provide.
Preview Your Widget
As you configure it, you can view a live preview of your zip code validator widget on the right side of the page (it’s below the configurator on mobile). Use it to test out your changes and see what your visitors will see.
Once you’re happy with it, simply click the “I Love It, Gimme the Code” button below the preview to generate your code.

Where to Paste Your Code
After you generate your code and the modal window appears with the snippet, all you have to do is copy and paste it wherever you want it to appear on your website. How to actually do it depends on how your website was built. If you built it yourself, you’ll know how to do it. If you had a web developer do it, ask them to place it where you want it.
With WordPress, you can go to the post or page you want to insert it into, go to the editor, and paste it there. Make sure the “text” tab is selected when you paste it or it may not display correctly!

After that, you should have a shiny new zip code validator widget appearing on your website. If you need to modify the zip codes, simply return to the widget generator page and generate a new one, and paste the new code in the same spot.